Glass or plastic jars in drawers: http://www.containerandpackaging.com/itemlist.asp?itemtype=Clear_Jars
Small ziptop baggies (look in the jewelry section of stores like Hobby Lobby)
Empty film cannisters
Tackle box or a travel system: http://www.qvc.com/qic/qvcapp.aspx/view.2/app.detail/params.item.F183006.desc.Creative-Options-Stow-n-Go-Rack-System/walk.yah.M228~E880~E810~E811
Floss organizers: http://www.amazon.com/Floss-Caddy-Compartment-7-x10-1-x1-1/dp/B000ZDME1A/ref=sr_1_3?ie=UTF8&s=home-garden&qid=1244335028&sr=1-3
Hardware cabinets: http://hand-tools.hardwarestore.com/70-420-storage-cabinets-small/storage-cabinet-603483.aspx?utm_source=nextag&utm_medium=cpc&utm_term=603483&utm_campaign=nextag
Ikea Fira mini chest: http://www.ikea.com/us/en/catalog/products/80073304
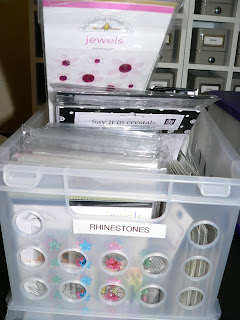
Stackable storage:
http://www.qvc.com/qic/qvcapp.aspx/view.2/app.detail/params.item.F182613.desc.Ultimate-Stacker-Storage---Red-Square/walk.yah.M228~E880~E810~E811
Container Store compartmentalized boxes: http://www.containerstore.com/browse/Product.jhtml?searchId=20640998&itemIndex=3&CATID=230&PRODID=71884 These come in many different sizes!
Mini Stackables:
http://www.bestscrapbookshelf.com/?action=view_catalog&Join_ID=176727
By Embellishment:
Brads: I have 3 systems for my brads.
First system: my general, run-of-the-mill brads are divided by color and shape into the multi-compartment containers from the Container Store. I keep them labeled and stacked in a drawer. If I need a brad, I use a pair of craft tweezers to get the one I want out:


Second system: my large brads go in large glass cannister jars. These are from the glass storage section at Hobby Lobby.
Finally - fancy brads are divided up by type (velvet, fabric, stripes, etc) into small plastic containers from Container and Packaging (link is above). The jars are thick clear plastic and are slightly shorter than 3" - which means they sit beautifully in the 3-drawer units from Sterilite! I used to house them in those drawers, I now have them in a single drawer in my scrap space:

 Notice that I store them upside down - makes it easy to see what's in each container, no?
A unique idea I found, I've never seen this before! Very clever. http://creatingkeepsakesblog.com/2009/03/10/storage-solution-brad-boards/
Primas:
I know these little flowers give people fits! I think they'd be easy to store if they didn't come in such pretty packaging - you want to keep the jars, but it's hard to find anything in those mixes. My solution - first, sort by color. ALL the flowers. Then divide up by size within the colors - my larger flowers go into these beautiful glass cookie jars from Hobby Lobby:


I have also seen them stored in shallow bowls or baskets, which is really cute. If you go to crops, re-using tins may be a good alternative: http://triplethescraps.blogspot.com/2009/03/organizational-friday-buttons-dew-drops.html
 Miscellaneous STUFF:
All those little things that really don't fit into any categories. Wooden pieces, photo corners, metals, sequins, acrylic pieces, glass slides. I use the same small containers as the fancy buttons in the Sterilite drawers - but I removed those drawers from the main unit and stack them in my drawers instead.

Now, I just gave you a lot of information. A LOT. I don't want you to zone out on me here, and get overloaded. If you feel overwhelmed, go get your original list - your what works/what doesn't, and your brainstorming list. Now check those against the solutions I've offered here. You can probably immediately cross a ton of options off your list based on things you've tried before and didn't work, or your stash size, or because things that spin scare you. Go to crops a lot? Cross off any system that won't travel well.
In closing, I want to add my 10 rules for organizing. I'm going to post these at the end of every challenge, because I think they are very, very important. I want you to keep them in mind as you tackle each of these projects - they will make your life easier and the task less daunting.
1. Label your containers.
2. Be consistent in your methods.
3. Don't be too specific - your search for your items within your space should be short and simple.
4. Your organizational method should be easy to take out AND put away.
5. When organizing, break any large piles into smaller groupings. Have a 2 foot tall stack of paper to sort? Do it in 1" high chunks, it will be easier to handle mentally.
6. If it's something that you use on almost every project, then keep it within reach of your main scrap area.
7. Don't stress your containers. Get a new system or purge your stash.
8. For most items, product packaging adds bulk. Toss it. With once exception - rub ons.
9. Repurpose when you can - almost anything can be painted or covered in paper/fabric.
10. THE GOLDEN RULE - FIRST choose an organizational method, THEN choose a container that fits your space and style. Always shop for containers with a list in hand - a beautiful container is simply clutter if it doesn't have a dedicated purpose in your space!
This comment has been removed by the author.
ReplyDeleteWhoops, accidentally deleted instead of edited:
ReplyDeleteI blogged my cheapo solution here:
http://www.simplyparticular.com/2009/07/my-love-affair-with-label-maker.html
Here's something I"m looking at as I have a bunch of the cups already.
ReplyDeletehttp://tidycrafts.net/cart/deluxe-craft-carousel-60-cup-organizer-p-28.html?zenid=15180b227dec241537ff32ace0ec883e
or Stampin Up makes one similar that takes up less 'realestate' on your counter.
I love how you said there would be a lot of cursing as tiny eyelets and brads fall from our grasp! HA! It's so true.
ReplyDeleteI love this whole challenge, first of all, and this week is no exception. I *think* I like the way I organize my embellishments, but sorting AAAAAALLLL my flowers by color is pretty tempting. . .
I have just completely finished my over haul. I didn't post pictures of the detailed organizing of small embellies but I have them in small containers in the CTMH embellishment cases. It works great and is portable to take to crops. Check out my blog to see the pictures. I am so proud of what I was able to do. You really helped me get jump started on this. I haven't actually followed you week by week. I read the first few posts, got super inspired and just went for it head first. I think that you would be proud of the results. Thanks for all of the time that this has taken you.
ReplyDeleteYou inspired me to get into this. Thanks.
ReplyDeleteMy start of my other embellishment is on my blog at http://craftymccrafters.blogspot.com I use the Creative Options tote for my brads and eyelets
I just stumbled on to this challenge while looking for embellishment storage ideas in the gallery at 2peas... I'm moving my scrap space from a corner of our large master bedroom to a downstairs room that's too small to really be a guest room... so I nabbed it. Embellishments are the thorn in my side, though, because they *could* fit so many different categories. I sit and hem and haw and lose valuable time! Thanks for a great set of ideas!
ReplyDeletebuy vidalista black 80 mg online you usually take tadalafil before having sex. Take 1 tablet at least 30 minutes before you want to have sex. Take this medicine in the dose and duration as advised by your doctor.
ReplyDeleteZiten 20mg Tablet is an antidiabetic medication utilized in the treatment of type 2 diabetes in adult patients. Patients are advised to follow a severe eating routine and exercise regimen alongside this medication for the most ideal impact. This medication isn't recommended for use in kids.
ReplyDelete